Sunday, 15 April 2012

Wearing Their New Outfits and A Feature

Hello.

We went to my cousins daughters birthday party today.
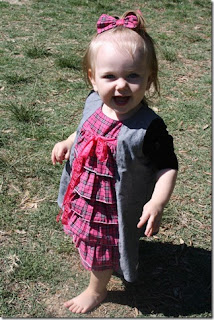
I just had to share some pictures of my girls wearing their special outfits I made for the day.


I actually missed the opportunity to take a photo with the girls all new and neat, with shoes and socks and clean faces, but still got some nice pics none the less.


On the slide with the birthday girl...


...and with each other.


I made up a bib to match the dress yesterday to avoid any food spills.


The wonderful day ended a little like this...


Sweet dreams ♥

♦♦♦

On another note.
Thanks guys!

They are having a linky party today so why not head over and show off some of your latest projects.
I'll see you there!

Linking up here:


Wednesday, 11 April 2012

Luck is following me around at the moment

Hello.

Tuesday morning I woke and checked my blogger dashboard and my emails
and discovered I had won 2 seperate competitions.


The first one I entered at Melly Sews and it was to win 4 Lily Giggle PDF patterns.

I chose the following


Then my next competition win was from Jenny at The Southern Institute 
where I won a $75 amazon voucher.

I spent almost a whole day deciding  what to buy and I ended up choosing the following.


For those of you wanting a more detailed look at this book check out this link.


The next item was Carefree Clothes for Girls


This one is a Japanese pattern book that has been translated into English.
Having this book as a reference will help me understand my other 
Japanese Pattern books a little better.

I still have about $10 left on my amazon voucher so I'll keep searching and maybe add a little something extra to this list in the future.

Anyway I want to shout out a HUGE
THANK YOU
to all involved in my wins.

If you notice me missing from blogland for a while
it's because I am very busy sewing with all of my new patterns.

Have a great day everyone!


Sunday, 8 April 2012

A tea towel dress.

Hello.

I found a cute tutorial the other day from Tea Rose Home on how to make a dress from 5 tea towels.
I just had to try it out.


I hadn't really read through the post thoroughly. I just looked at the pictures and read the directions. Having re-read it once I finished the dress it states that the dress best suits a 6 year old.
Well my girl is only 4 years old so this dress it slightly huge on her.


It still is a cute dress.

I am looking into how to donate this dress to dress a girl around the world.

 It was just such a cute project and I couldn't resist trying it.


Saturday, 7 April 2012

Organising my sewing centre...continued.

Hello.

Well to continue on with the organisation of my sewing centre I'd like to show you how I sort out all of my patterns.

I keep them in baskets in my buffet.


I trace the pattern I'm using onto tracing fabric (there are many brands available but I use the very thin sew on interfacing) and store each size in it's own zip lock bag, labelling the bag with the size enclosed.


I then put the main pattern envelope in a large zip lock bag with all of the individual sized zip lock bags.  
I find this an easy way to preserve the original pattern and keep all previously used patterns easily organised.


♦♦♦

 I keep this draw in my buffet full of my most useful tools including all my scissors and pins as well as my size labels and my "adore" clothing labels.

The little pouch came from my Oma. It was handmade a long time ago, I remember her telling me her niece made it for her. I use this to hold my small collection of hand embroidery things.


Now when I collected my Oma's sewing items this box was amongst her things. My Opa (German Pop) was a carpenter and so he had made this box out of scraps he had around the house.


I thought it would be great to store all of my small items like needles, tape measures, marker pens and chalk, chopsticks (I use these for pressing out corners and seams).

It makes me happy to keep a memento of my Opa and use it in a way that makes my life better.
♦♦♦

My next point I wanted to show you was how I organise my fabric.
This made the post way too long so I will save it for the next and final post of
"Organising my Sewing Centre"

So stay tuned :)


Friday, 6 April 2012

Version 2 of the Sunki Dress

Hello.

I have made another Sunki dress, this time for my 10 year old.
Here it is.


I made the size 8-9 even though my daughter is 10 years old. 
The size chart matched almost spot on for her using the 8-9, except for the length.


It is actually quite a short dress, but looking back to the 60's style, still acceptable.
A pair of tights or even jeans would fix this issue.


I used quilting cotton for this dress. The fabric itself has a softness to it that reminds me of brushed cotton.


I made a matching headband to accentuate the 1960's feel this dress has.


I cut the side panel pieces on the angle to give a bit of dimension to the dress.


I really do love this dress.
I'm thinking next time I'll make it about 5 inches longer in a plain fabric, maybe denim.


Wednesday, 4 April 2012

I made a SUNKI dress - I'll show you how I did it.

Hello.

I have eyed off the SUNKI pattern for quite a while. I couldn't resist any longer and I purchased it the other day. I was so pleased that it only took 6 days to arrive - America to Australia.
That is awesome.


I was quite apprehensive to make this dress as it is marked as an Intermediate Skill level and I wasn't sure if I could do it. I had some tips pinned to help me through. And the wonderful people at Figgy's were happy to receive any questions I had via email. Great service.
Anyway. I started at the very beginning and went slowly.
Step 1.
Trace pattern and cut out all pieces. Transfer markings.
I actually made a mistake on the very first step.
The sizes are doubled up, so you have 18mths , 2-3, 4-5, 6-7 & 8-9. My daughter is in a size 3-4. I traced around the 2-3 thinking it was 3-4. Luckily I hadn't cut out my fabric so I then traced the 4-5 and used that size.

Having now finished the dress it is slightly too big but I'm sure after a couple of washes and a couple of months it will be the perfect size.

Step 2.
Apply interfacing and finish bottom edge of facings.


Step 3.
Attach the pocket bag.


Step 4.
Attach side panels. There is a tutorial here that helps to explain attaching the pockets in a little closer detail.
Angry Chicken has also linked some pictures here help a bit too.


Clip curves on side panel.
Turn pocket bags to inside and topstitch.


Step 5.
Line up bottom of pocket bag and side panels and sew along curved edge.


Step 6.
Continue to topstich the upper side panel.


Step 7.
Here is an easy way to attach the Zipper !!!!
Sew back pieces up to the zipper mark.
Continue to sew up to the neck with a basting stitch.


Step 8.
Pin zipper right side facing the pressed open seam.
Stitch around the zip. Open and close your zipper as you sew to avoid sewing along side the zipper head. Removing basting stitches.


How easy is that?


Step 9.
Attach facings.


Trim and turn.


Step 10.
Overlap shoulders with back pieces over the front.


Step 11.
Pin pleats on shoulder. Baste.
I found that my pleats were too narrow and my sleeves were too big to fit into the armholes of the dress so be quite generous when pleating. 


Step 12.
Sew underarm seam of sleeve and side seams of dress.
Sew sleeve to dress.
Hem sleeves and dress.
I actually sewed the hem on the sleeve before attaching it to the dress, much easier.


Apply your labels and your done.
Of course there are much more detailed directions with the pattern.
I just wanted to relieve any fears you may have about taking on this pattern for yourself.
It is a real grown up looking dress packed full of style.
I just love it!


A fabulous dress ready for gorgeous girl ♥


And now after a million photos and a few smiles she has had enough.

Linking up here:

LinkWithin

Related Posts Plugin for WordPress, Blogger...