Thursday, 29 December 2011

Blogger's Choice Fat Quarter Bundle Competition Entry

Hello.

I saw this fabulous competition over at Quokka Quilts.

This is my entry:


They are offering a 1/2 yard of each of your choices as the prize.
Whoo hoo!!!


This is all you have to do:

Go to The Fat Quarter Shop website and choose 12 coordinating prints and 3 solids from their selection.

Either a) create a blog entry about your set of fabrics;
or b) if you don't have a blog, upload them somewhere they can be seen in one link - eg flickr, picasa, etc.
You must include pictures of your fabrics. You can 'borrow' these from the FQS site.

It would be very helpful to the judges if you could do a photo collage of your various prints.

Go back to Quokka Quilts and link in your entry by 15 January.
Link your photo collage as the thumbnail if you can.
I'm going to post mine right now!

Good Luck everyone!!
Posted by Picasa

Tuesday, 20 December 2011

Very Girly Romper

Hello.

I especially love little rompers on babies so I purchased a new pattern and made this outfit.


The pattern is New Look 6970.
It also has a dress and bloomer option with this pattern.

I made a matching bib and bow to complete the outfit.


 This material is so babyish and very girly.
I didn't have matching buttons...grrrrr...but I thought the white side buttons were
camouflaged so I could get away with using odd buttons.


Instead of putting press studs under the crotch I stitched the seam closed.
I think it looks a little neater and I am a little lazy :-) 


Sunday, 18 December 2011

A Blue Linen Dress

Hello.

When I purchased my Japanese pattern books I made a pact with myself that I would make each pattern at least once. So to keep the ball rolling I decided to make this dress.


I thought to myself that I would try to follow the dress in the book as close as I could so I kept the fabric the same. I picked up this blue linen fabric from the op shop. I was so surprised that it was actually a piece of unused fabric and not an old curtain or sheet etc... It was almost 2 meters in length and only cost me $3.
What a score! 


I used some left over pink fabric from this outfit for the casings.   


I really do like this dress. It didn't ruffle up on the bodice as much as the example in the book did, but I don't think it matters too much.


Well that is another one to tick off from the book, only about 30-40 more to go...
Good thing I love to sew ♥


Tuesday, 13 December 2011

Purple Summer Outfit

Hello.

I made another little summer outfit for my little baby the other day.


I used the same pattern for the top as I used in this post
and the same pattern for the pants as I used in this post.
I did alter the pants in this outfit though.


I added the patches (which I lined with towelling) to the knees to act as extra comfort for my crawling girl. 
I put an elastic casing at the bottom of the pants rather that up the leg
to hold the pants down so the patches stayed on the knees.


I had seen the idea for the knee pads here on Rae's blog and here on Dana's blog.

I used the purple seersucker gingham I picked up from Spotlight for $3 p/m. The purple circle fabric was also from Spotlight and once again from the cheap rack (I think it was $6 p/m)

I'm not sure why this pic shows up on it's side, but I can't flip it :-(

The bib was made to match because my baby spends most of the day wearing one in an attempt to stay clean, something I have struggled to do with all my kids. 
I made a little bow to match and just hot glued it onto a little clip I had.


Overall I am very pleased with this little outfit.

Friday, 2 December 2011

Matching Nighty and 2 pairs of PJ's

Hello.

I went shopping at the op shop the other day and found a really beautiful sheet. It was made from brushed white cotton and was just so soft. It had the prettiest trim along the bottom with a pink velvet ribbon and a pink satin ribbon and it only cost me $3.  I thought it would be perfect for sleepwear as it's original use was for sleeping. This is what I turned it into.


I made my little baby these cute PJ's form this Kwik Sew pattern.
It wasn't actually a pyjama pattern but I thought that it would do.


I made the nighty for my 3 year old using this free pattern & tutorial.


And these PJ's I adapted from this pattern & tutorial. My 10 year old preferred PJ's to a nighty so I made up some bloomer style pants using a pair of shorts as a pattern.


I just love making matching outfits ♥


I have also made up a little sunhat with the same sheet and I still have material to make up some little shoes. I'll post about that soon...


Sunday, 27 November 2011

Boys Big Bum Baby Pants

Hello.

My son's Kindy teacher asked the other day if I could make her something for her little grandson. 
I didn't have many baby boys patterns to choose from.  I decided to make her a pair of pants using my


This is a great pattern that can be used for boys & girls.


I made a couple of matching bibs to complete the outfit :-)


Loveheart Dress

Hello.

I wanted to share this dress I made for my daughter yesterday.


It was the first time using the Lily Bird Studio pattern Sasha Jumper Dress.
I just love it! The patterns are so easy to follow.

I purchased this pattern because my daughter is starting Kindy next year
and I thought it would make the cutest little school dress.

This little dress was made from quilting cotton that has a natural calico look to it.
I picked it up on special at Spotlight for only $4 p/m.

I love a bargain!

I used little pink loveheart buttons on the back. They are not an exact match for colour,
but they are close enough to be ok.

I have a little bit of fabric left so I will see if I can made a little matching piece for my baby.
I'll be sure to post it when I do :-)


Tuesday, 15 November 2011

Ben & Mia Pants

Hello.

I bought 3 PDF patterns from Lily Bird Studio, including the "Ben & Mia Pants".
I made a pair for my 4 year old son.

Front with Pockets

Back

This is such a great pattern, as are all I purchase from
Lily Bird Studio. They are so comprehensive. The pattern was emailed so quickly and has detailed instructions of every step. This pattern actually had 49 pages so I just printed out the pattern pieces and just referenced from the computer. Saved heaps of paper and ink this way :-)

I decided they were quite a dressy style pant and they would look great with a little tie so I made one using this tutorial from See Kate Sew.

I slightly altered the design and made it adjustable using 4 press studs on the back. I actually don't think I followed the directions/pattern properly because my tie was not long enough
to fold over the neck piece as the tutorial explains.
I just folded the top of the tie over the neck piece and stitched it closed and added a piece around the top to give the illusion it had been tied.


Now I just need a special occasion for him to wear them :-)

Sunday, 13 November 2011

Green Pleated Bag - Free Pattern & Tutorial

Hello.

I made this little bag up the other day.


I used the free pattern and tutorial I found here.

I like the way this bag turned out but next time I will make a few changes.
I don't like such a stiff bag so I will use a lighter weight interfacing and
I will move the straps a little closer to the middle.

It was supposed to close with a magnetic stud but I decided not to use one.
I figured the bag was deep enough that nothing was going to fall out.

I like having the pocket on the inside so I can easily find my phone.
I wanted to sew a little fob for my keys in the lining but I forgot. Grrrr...

I made my own navy piping which I am pleased with.
It is actually really easy and I'm going to use it much more often.  


Urban Girl Wrap Skirt

Hello.

Well I was so excited to receive my pattern and fabric I ordered with my $25 voucher I won from Shabby Fabrics. I really have not made that much for myself so this time I was thinking about me :-)

I used to wear alot of wrap skirts in years gone by. They are really comfy and quite flattering.
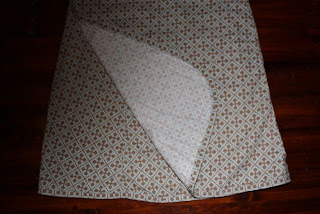
This is what I ended up with.


The pattern is called Urban Girl Wrap. It has the option of having a ruffle all the way around it. I prefer it a little less frilly. I also shortened the pattern by a few inches as I'm not very tall.


I used the Michael Miller fabric Antiquity Quatrefoils. It is not too bold. I nearly had a major disaster though. I was supposed to cut 3 pieces for the tie and silly me only cut 1. I then used ALL of the rest of the fabric to make the bias binding. When I discovered my mistake I called my local Spotlight store to see if they had any.

They didn't.

I ended up cutting the 1 piece I had in half which gave me 2 pieces 1/2 the width I needed. This was enough to get the job done but it was only just wide enough to put in the buttonhole to thread the tie through.

I am still really happy with the result and have worn the skirt a few times already.
I will definately make another one for myself down the track.


LinkWithin

Related Posts Plugin for WordPress, Blogger...