Wednesday, 14 March 2012

A Little Embroidery

Hello.
I wanted to try my hand at a little embroidery. I really didn't know what I was doing so I searched for some good tutorials and found this one.
I decided to make a pair of Ben & Mia pants for my baby (whose is almost 1) and my nearly 4 year old.
I had already made some for my little man here.
I thought I'd just embroider the pockets in a random pattern.


I tried out the lazy daisy and the basque stitch as well as some french knots.
Then I tried the basic chain stitch and turned it into a whipped chain stitch.
Although my stitches are FAR from good, I'm still very happy with the result.
I can already see that I have improved since the first stitches I made. It's all in the tension.


I decided only to use the pockets on my baby's pants as my stitches are a little too loose and probably wouldn't hold up to a 4 year old playing around.


I ended taking up the pants by 3.5 inches for the size 1's to fit my girl.
Even after that I found they fit better by rolling up the cuff.


I left the pants for my 4 year old quite plain, just white piping around the pockets and contrasting white stitching.


And some photos from another day...


 I just love my feral bunch.
xxx


Linking up here:


Saturday, 3 March 2012

A birthday dress or two...and a skirt to match

Hello.

My cousins little girl is turning 1 next month so I thought I'd make something special for her.
Because my little girl is also 1 next month, I thought I'd make her a matching dress.
This is what I came up with.


Once again I used this kwik sew pattern. I love how quick and easy it is.
This time I added 4 inches to the bottom to turn it into a dress.


I had spotted an awesome tutorial to add some ruffles to an a line dress from iveyc95 and thought this would be the perfect opportunity for such a dress.


When cutting the original pattern piece to get the ruffle section piece I would recommend making two new pattern pieces with the added seam allowance.

I had written on my pattern pieces to add the seam allowance when cutting but had forgotten to read it!

Luckily I noticed before I cut out the ruffle section so I was able to added double the seam allowance to that piece which actually made to ruffle section a little larger than it would have normally been.


Instead of risking stuffing up with the buttonholes I opted for the press studs. I'm not sure if 3 press studs will do. I'll let my little girl test it out and see if I need to add in a couple more.


I had a few ruffles left over and wanted to use them to make a matching skirt for my 3 year old.
I took the same tutorial and applied it to one of my own patterns. I also incorporated a little of this pattern I used for these little skirts and came up with this.

Back View
 My 3 year old daughter asked if this was the back. When I said yes she said "I don't like that".
Doesn't she know that ruffles on the bum are soooo cute?

She does like the skirt though, luckily :)

Front View


Like with the little dress I used a press stud to fasten at the waist.


And as with all the little outfits I make for my girls I had to add a little matching bow.

You can see the girls weraing their cute new outfits here!

Linking up here.

I've been featured!

Hello.

I just want to say a big thanks to Pam for featuring my 4 Layers of Pink skirt on her blog.
It was one of the top 4 viewed skirts.


That just makes me smile.

Pam hosts the best link party's.
They each go for a year so every time you make up a new item you can share it on Thread It Your Way.

It's a great place to visit if you need a little inspiration too, so go check it out now.
Make sure you say hi to her from me :)


Tuesday, 21 February 2012

Baby Shower Gifts Galore

Hello.

My best friends daughter is having a baby. I thought about what I could get her and it was obvious that it was going to be something I made.
This is what I ended up with.


The pattern I used for the top was Kwik Sew 3035.
Here and here are some other things I have made with this pattern.


I tried out a new technique - reverse applique.
I'm not sure if that is the technical term, but I think the result turned out how it should.
The top is made from poplin, cool for the summer.


Even with such thin fabric I couldn't manage a decent buttonhole with my machine.
I thought I'd stuffed up the top on the first buttonhole but I managed to unpick it without too much of a mess and decided to use press studs instead.

The pants are Rae's Big butt baby pants. I love this pattern.
Check out some other pants I made here and here.


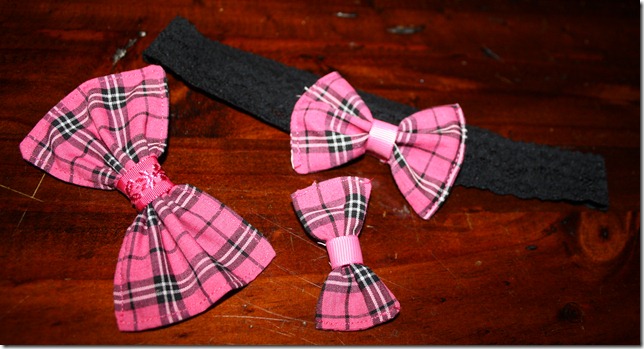
We know a baby girl is on it's way so I just had to make a hair bow to match.
Let's hope she has enough hair to hold it :)

I also made up a dummy clip to match.


Then I made a couple of bibs,


and a travel wipe and nappy pouch.
I used this pattern and tutorial from Melissa Esplin.
Here is another one I made for myself.


And here is it all wrapped and ready to be given.


I hope she likes it ♥

I've been featured at Threading My Way
 

Saturday, 18 February 2012

Vintage Overalls

Hello.

My friend Laura picked me up a super cute vintage pattern for Size 1 overalls for 50c from our local swapmeet a while ago. I have been waiting for my little baby to grow enough to fit this pattern. By the time Winter arrives I'm sure these will fit her just fine.


I made these overalls from a lightweight stretchy denim and lined it with pink linen.


I used the buttons I salvaged from a Winter coat my 3 year old daughter used last year.

Don't mind my chalk markings around the buttons.
I forgot to wipe it off before I took the picture.
I changed my tactic when dealing with the buttonholes on my machine.
You may have read this post that explained my sadness over my machine failing it's buttonhole task.
This time around I used my regular presser foot and just manually zigzagged the buttonhole.
This worked effectively.


I made some changes to the pattern by using 2 pieces for each strap. This allowed me to match the underside to the lining.
I also added a pink cuff to make it more girly.


So cute, hey?


Fabric Flower Headband

Hello.

I spent quite a while today looking through blog land,
focusing on lots of headbands and fabric flowers.
I gave it a go and came up with this one.


I am so pleased with the result.
I used this tutorial from Little Birdie Secrets.
I think it turned out exactly as it should have.


I added 3 matching buttons to the center and attached some beads over the flower. 


I then hot glued it to some elastic lace to complete the headband.


This flower headband is a very easy project and is something you can get your kids to help with.

Linking up here:


LinkWithin

Related Posts Plugin for WordPress, Blogger...